Pages

Saturday, August 18, 2012

Some of my Favorite Things


Here are some of my favorite kitchen things, Take 1
(AKA The Pampered Chef Must-Have List!):


Bamboo Cutting Board (for Dear Hubby, the meat slicer in our family)


Let's go shopping!!
* To order the above Pampered Chef items, or any others, join my Online Catalog Party!! *
** https://www.facebook.com/groups/244175129031666/#!/events/320195131410076/ **

Remember ~ Life is better with a bit of flavor!

Bit of Flavor Easy Basil Pesto Salmon


Bit of Flavor Easy Basil Pesto Salmon

Ingredient List is at the end...


I just tried this recipe this week, and we all really liked it!  It was super quick and easy, which makes it perfect for a busy week night dinner.


1) Lay the piece of fish in a lightly oiled baking dish or pan. 
Cut a lemon in half, and squirt the juice over the fish.
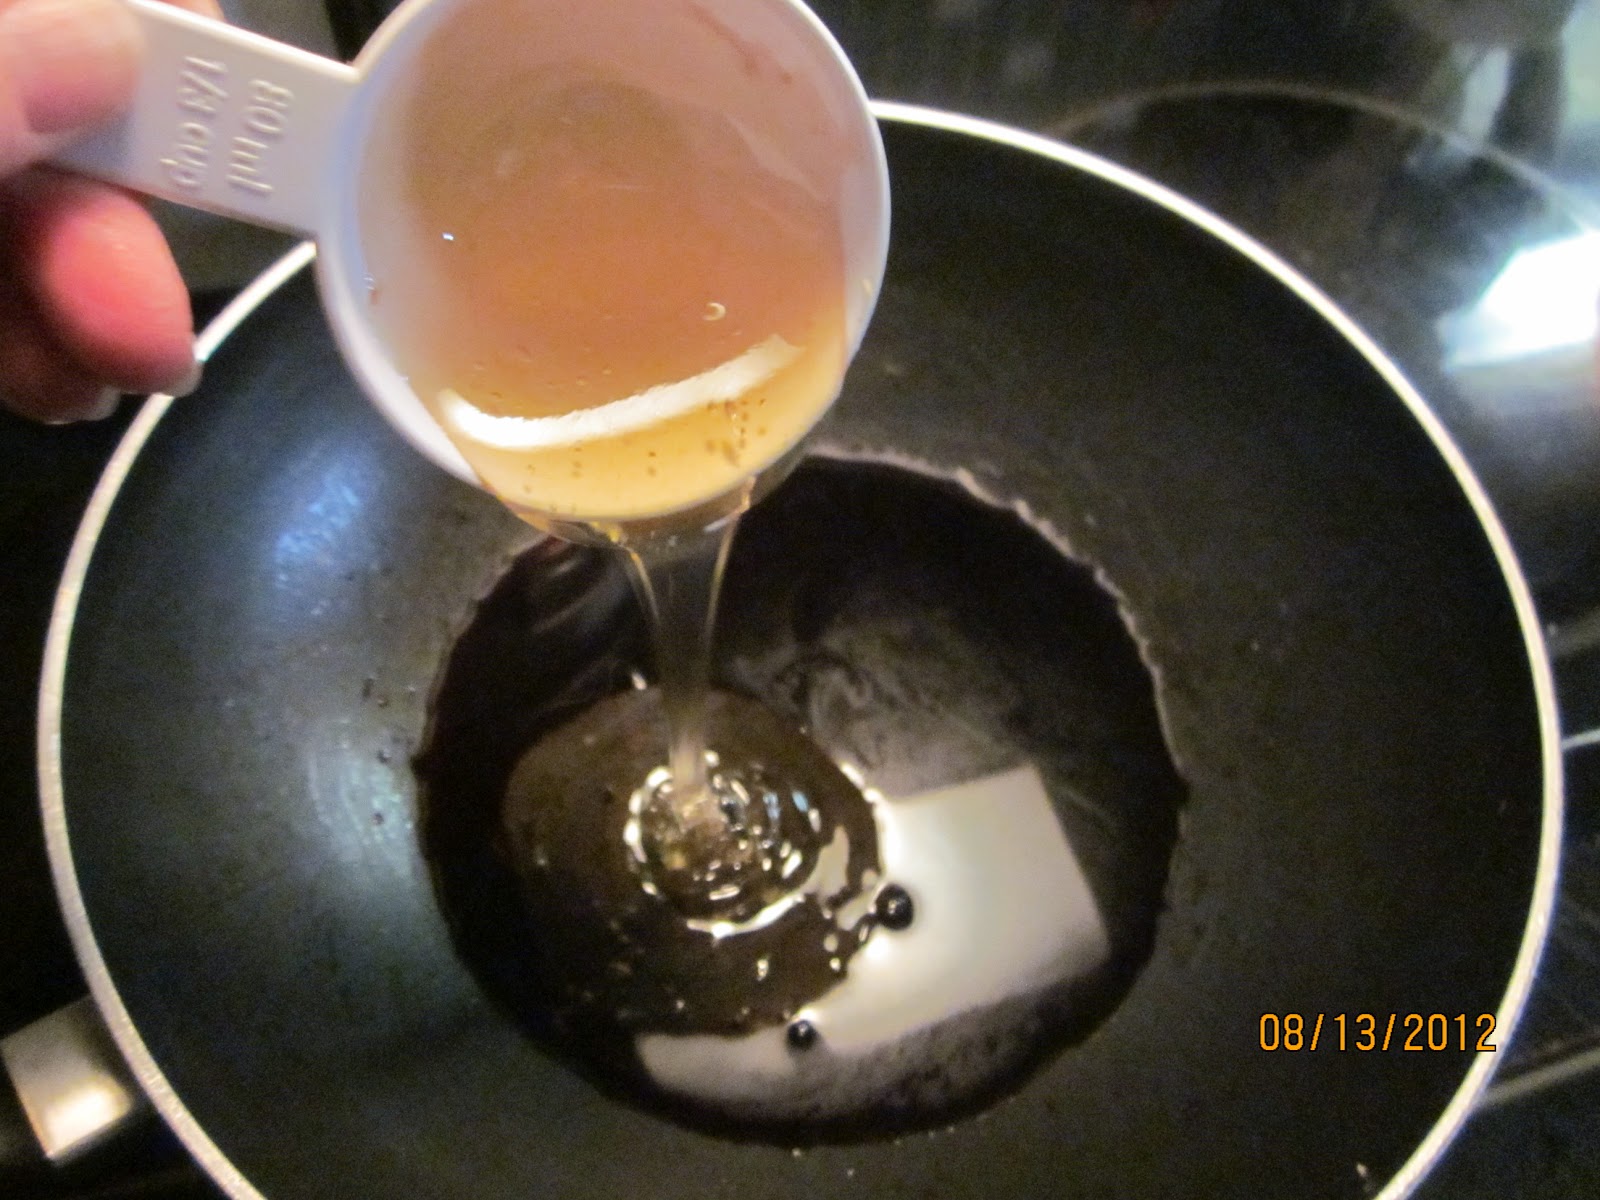
Pour the wine over the salmon. 

Let it rest while you prepare the topping.


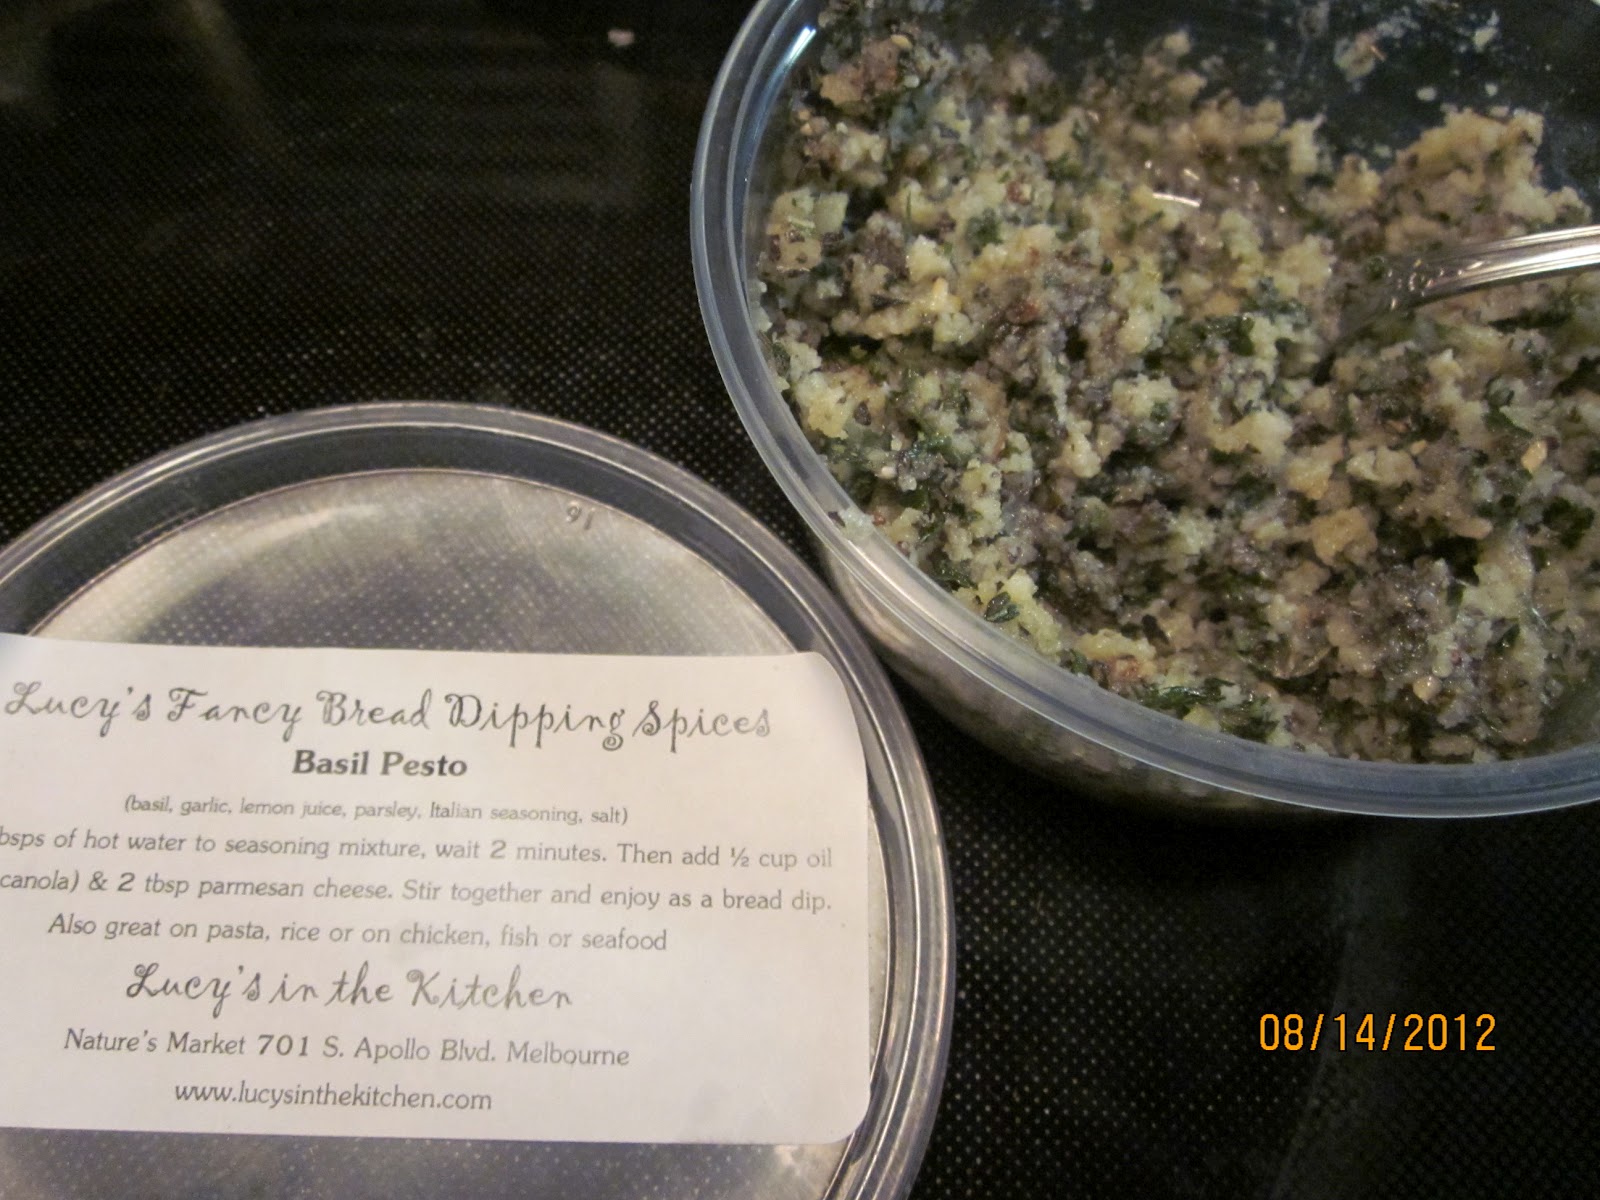
2) Time to make up your topping for the salmon!  You can use whatever herbs and seasonings you are in the mood for. 
For this version, I actually used a container of herbs that I picked up at a local natural foods market (Natures Market - what a great place, with great people!).  The seasonings are for a Basil Pesto mix.  I added the olive oil, panko, and parmesan cheese, and stirred it all together.


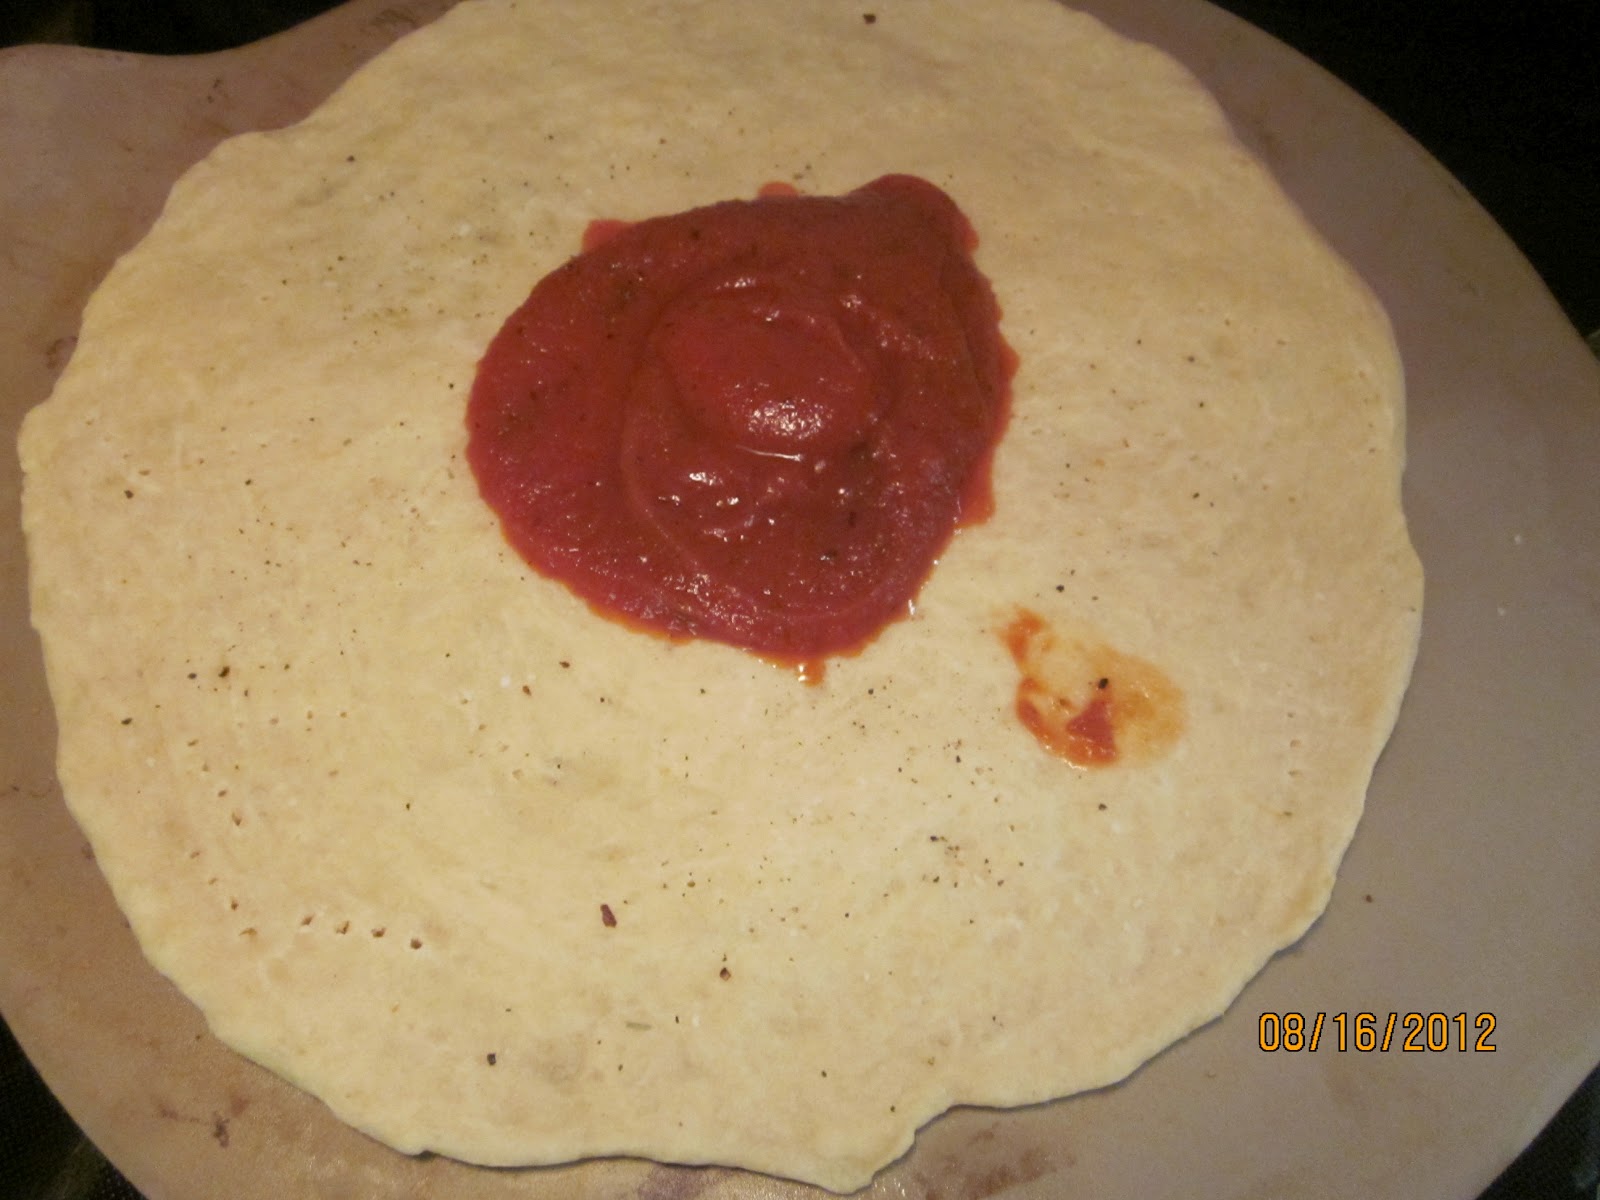
3) Spoon the mixture over the salmon, and spread it evenly over the top.
 
Preheat the broiler.


4) Place the dish in the oven, about 9" away from the broiler.  Broil for about 8-10 minutes, until fish is opaque and flakes easily with a fork and topping is browned.
 
Remove from the over and let rest for a few minutes.


5) Serve with your favorite sides, and enjoy!!
 
Ingredients:
1 1/2 lb salmon
1 lemon
1/4 cup of white wine
** Special Seasoning **
1/4 cup extra virgin olive oil
1/4 cup panko
1/4 cup parmesan cheese


Remember ~ Life tastes better with a bit of flavor!

Friday, August 17, 2012

Bit of Flavor Homemade Top-It-Yourself Pizza


I LOVE pizza!!  I am willing to eat almost any pizza, from anywhere, including from frozen...  But my favorite pizza is definitely one made and home, and topped just the way we want it!

Here is a simple way to enjoy healthy, homemade pizza in basically the amount of time it takes to have one delivered.


1) Pour your preferred pizza crust mix into a large bowl (mine is a Pampered Chef Bamboo Bowl, similar to this one), and mix following package directions.  Mine is from 2 packets of mix (so we could have TWO pizzas!) to which I added 1 cuo of hot water, as instructed.  I stirred with a fork, brushed a little Extra Virgin Olive Oil over the dough, covered it, and set it aside for about 15 minutes.


2) Meanwhile, preheat your oven to 475 degrees, and prepare your toppings.  This was an easy night for me, as it was just me and the Savage One.  We like cheese and more cheese, and I like pepperoni and onion.  Minimal prepping and chopping on my part.  Dear Hubby, aka The Bird, who likes all kinds of toppings, was out at a meeting that night.  Otherwise, I would probably still be in there chopping stuff up...  ;)


3) After your dough has sat for about 15 minutes, plop it onto your lightly greased pizza stone or pan and mash it down and into a bit of a circle.   I'm using my Pampered Chef Stones (one flat, one with built-in handles which makes it easier to use). 


4) Next, grab your Very Special Tool (AKA my new favorite kitchen tool, the Pampered Chef Baker's Roller!!), and roll out your dough!!  This thing is truly amazing, and for the first time ever, I had NO trouble spreading out the crust and having it keep its shape!  I like my crust thin, 'cuz that's how I roll.  :)


5) Now, place your crust into the preheated oven, and bake for 5 minutes.  Remove carefully and set in a central area.  It's time to call your people in and let them top away!!


6) First, some sauce.  Whatever kind you like.  Spoon it on, or pour it if you are impatient.  Spread it around, right up to the edges.


7) Maybe some cheese, if that's your thing.  It's certainly ours! 


8) Add any - and all! - other toppings that are calling your name.  Spread them around, make happy faces, spell your name, whatever...  It's your own little piece of art.


9) Slide your pizza back into the hot oven.  Set the timer for 9-11 minutes, or as directed on the package.  Keep an eye on it.  You know it's ready when the edges are starting to brown and the cheese is bubbly.
When cooking two, as I did, you should swap their places about halfway through. 


10) When the time is up, when they look and smell so wonderful that you can hardly stand it, it's time to take them out!  Slice, and enjoy!!

* To order the above Pampered Chef items, or any others, join my Online Catalog Party!! *
** https://www.facebook.com/groups/244175129031666/#!/events/320195131410076/ **

Remember ~ Life is better with a bit of flavor!

Tuesday, August 14, 2012

Bit of Flavor Pepper Steak over Rice


Pepper Steak over Rice - sometimes you just have to have some...  and last night was one of those nights for us!

I basically used the recipe I found on allrecipes.com:
http://allrecipes.com/recipe/marias-pepper-steak/detail.aspx?event8=1&prop24=SR_Title&e11=pepper%20steak&e8=Quick%20Search&event10=1&e7=Home%20Page

Ingredients:
2 tablespoons olive oil
2 cloves garlic
1 medium onion
2 large bell peppers
1/3 cup soy sauce
1/3 cup honey
1/3 cup red wine vinegar
1 1/2 lbs flank steak, cut into strips
2 cups rice


1) Mince the garlic.
The recipe called for 2 cloves; we like garlic, and I used 3 cloves.  Your call.
I love my Pampered Chef Cutting Board!  I use it for all of my fruit and veggie jobs.
And yes, I know that there are other (easier?) ways to prepare the garlic; I happen to enjoy doing it all by hand.  However, I just might put the Pampered Chef Garlic Peeler and Slicer Set on my Wish List...


2) Chop the onion.
Yep, I'm using my PC Cutting Board again!
The recipe called for chopped onions, so I chopped the heck out of mine. Next time, I think I will just cut the onion into thin slices.


3) Slice the pepper into thin strips.
I used one red and one green pepper.  And my PC Cutting Board, of course!  ;)


4) Slice the steak.
Or do what I do - buy it already sliced!


5) Start your rice.
I use a mix of equal amounts white rice and brown rice.  I keep it stored already pre-mixed.  Makes it simple when I'm in the mood for making rice!
I'm only allowed to make rice in my Rice Cooker.  It was a gift one Christmas, and I have used it, abused it, melted at least one leg off of it...  But it keeps on saving my rice and keeping it edible, every time.


6) While the rice is cooking, heat the oil in a heavy skillet over medium-high.


 7) Add the onion, pepper, and garlic.
Cook 2-3 minutes, stirring frequently, until veggies are tender-yet-crisp.  Set aside.


8) In the same skillet, heat the soy sauce, honey, and red wine vinegar over medium high.


9) Add the steak.  Cook until done, maybe 10-15 minutes, stirring frequently.
Have you been admiring my Pampered Chef Bamboon Spoon?  I bet you have been.  I would be too, if I were you.  This pointy-tipped one is my favorite.


10) Add the veggies to the meat, and cook for another 10-15 minutes.
Flavors will mingle.  Your house will smell so good.  You'll end up very, very hungry.


See??  You'd love some right now!!


11) About the same time that your meat and veggies are done, your rice should be ready.  Spoon some rice out onto a plate, and top with the Pepper Steak.  Enjoy!!

When you do try this recipe, be sure to let me know what you think!  Did you make any changes?  Add anything?  I'd love to hear from you!

Remember ~ Life is better with a bit of flavor!

Monday, August 13, 2012

Bit of Flavor Homemade Potato Chips


One of our favorite healthy snacks these days is Homemade Potato Chips. 
Sit back and enjoy as I take you through it, step by step...


1) The first step is to gather everything you will need.

Ingredients:
4-5 Russet or other potatoes
Salt
** Special Seasoning **

Kitchen Items:
Large Cutting Board
Large Knife
PC Simple Slicer
PC Micorwave Chip Maker (more about this shortly...)
Spatula


2) Rinse the potatoes and pat dry.  Cut in half cross-wise.


3) To get wonderfully thin slices, I use my Pampered Chef Simple Slicer.  This tool is very safe and easy to use, and clean up is a snap.


4) Slice all of the potatoes.


5) Lay out some slices on clean paper towels.  Season with salt, and any other seasonings you might like.  I did some with just salt, and some with salt and our family favorite - Butt Rub.  You can blot the top after a few minutes, as the salt will draw out the moisture in the potato.


6) Now, for the MAGIC part...  I use my Pampered Chef Microwave Chip Maker sets.  Yes, sets.  I have two sets.  One set was not enough.  You'll see, and you will come to agree.


7) Arrange the slices in a single layer on the chip maker.  Fill up one chip maker, then top it with a second chip maker and load that one up too!


8) Put the two stacked chip makers in the microwave, and set it for 3 minutes.


9) After 3 minutes, use hot pads to remove the tw chip makers and swap places, so that the top one is now on the bottom.  Put them back in the microwave, and set it for another 30 seconds.  Continue cooking at 30 second intervals until desired crispness is achieved.  For our microwave, it takes a total of 5 or so minutes.

10) In the meantime, load up two more chip makers as above.

11) Once the first batch is done, carefully remove the stacked chip makers using hot pads.  Set them to the side to cool, and put the next set in the microwave.  Continue as above.


12) After the chips have cooled for a few minutes, use the spatula to remove them to a serving dish.

13) Enjoy as is, or with your favorite chip dip!


* To order the above Pampered Chef items, or any others, join my Online Catalog Party!! *
** https://www.facebook.com/groups/244175129031666/#!/events/320195131410076/ **


Saturday, August 11, 2012

Bit of Flavor Easy Chicken Parmesan over Noodles


On the menu for tonight -
Easy Chicken Parmesan over Noodles, with a side salad

Ingredients:
4-6 split boneless, skinless chicken breasts
2 large eggs
1 cup Panko
1/2 cup parmesan cheese, times 2
** Seasonings **
1 can Hunts spaghetti sauce
1 cup shredded mozzarella cheese
1 lb box of spaghetti (or a gluten-free option)
Cooking Oil (I use extra virgin olive oil)
Salt & Pepper


1) Here's the first most *Easy* part of this recipe -
Open the package of chicken breasts, and season them with salt and pepper.  I like the grinder kind of sea salt and black pepper that can be found at the grocery store.  I'm *Easy* like that.  ;)
Why this step is so *Easy* -
Most Chicken Parmesan recipes call for placing the breasts between wax paper and pounding on them to flatten them.  I don't like to do this; I like my chicken breasts to be thick, and I think mine come out tasting just great regardless.


2) Break 2 eggs into a shallow bowl, and beat them slightly with a fork or a wire whisk.  You can beat them more than slightly if you feel the need.
I like my Yin Yang eggs, seen here prior to being beaten.

 
3) In another shallow bowl, mix the Panko, 1/2 cup of parmesan cheese, and your preferred seasonings.  I used a decent amount of freshly ground Italian Seasoning Mix and our family favorite seasoning, called Butt Rub and introduced to me by my dear friend Marion on a visit to St. Augustine, which goes on 85% of what I make.

 
4) Take one chicken breast and dip it in the egg, then lift it out to allow most of the liquid to run off.  Next, dredge the breast in the Panko mix, being sure to cover all sides with the mixture.  Set on a clean plate.  Repeat for each breast.
Let the breasts sit for about 15 minutes.

 
5) Heat about 1/2 cup of oil in a heavy skillet over medium high.  Once ready, add the breasts 2-3 at a time, and cook about 2-3 minutes per side.  The idea here is to give a little crispiness to the outer coating.

 
6) Place the crisped breasts in a 13x9 or similar pan.
(Yes, mine aren't too pretty at this point, but trust me - it's all good!)

7) Here's the second most *Easy* part of this recipe -
Pour one can of spaghetti sauce over the breasts, letting it run in between and along the edges of the pan.  Be sure each breast is nicely covered with sauce.
Yes, you could make your own sauce, or doctor something up, but then I probably wouldn't call your version "Easy"!

 
8) Cover each breast with a decent (or huge, as you can see I went with) amount of the shredded mozzarella cheese.
Spread the remaining 1/2 cup of parmesan cheese over each breast as well.
Add more of your selected seasonings if you would like.

 
Yes, on closer inspection, that looks like the Just Right amount of cheese and seasoning!

9) Pop the pan into a 450 degree oven, and cook for 25-35 minutes, depending on the size of the breasts.

 
10) Prepare a salad, whatever that might mean at your house.
I used a lettuce mix that I had previously rinsed and torn, and just poured it into a large bowl.  I cut up a few veggies that we enjoy and added them to the salad, and set out a few toppings on the side.

 
11) In the meantime, set a stock pot of water on a large boil and set to high.
Once the water comes to a boil, add one box of spaghetti noodles (or your choice of a gluten-free option). 
Cook to al dente as directed on the box.
Drain and keep close by.

 
12) When the chicken is done, remove the pan from the oven and assemble the dinner plates by putting some noodles on the plate and topping with one chicken breast.  Spoon some of the sauce liquid over the chicken and noodles.
Serve with your salad.  Bread would be nice, too.

Are you ready for our verdict??

It was DELICIOUS!!  It came out looking a little dark on top, I'm sure due to the high heat, but once I spooned a little extra sauce over you couldn't even tell, and it tasted just right.  I will be craving this one...

My official taste testers weighed in with thumbs up from both guys.

And the final *Easy* part?  THEY cleaned up for me!!

If you try this recipe, I'd love to hear about your experience!  Will you change anything?  Add or remove any ingredients?  Share it with us, and send pictures, too.

Remember ~ Life is better with a bit of flavor!